Game guide
Everything you need to know to rule your realm. New here? Play free, then come back whenever you have a question.
Dukes & Dragons is a browser strategy game: build up your realm, raise armies, conquer land, and rise to the top of the round. Everything keeps running while you are away.
Getting started
- Choose a race. Each race has strengths:
- Human — Balanced settlers with a knack for trade. (+10% gold production, attack 0%, defense 0%)
- Orc — Brutal raiders who favor the axe over the ledger. (no production bonus, attack +15%, defense -5%)
- Elf — Forest-dwellers with deep knowledge of timber and craft. (+15% wood production, attack -5%, defense +10%)
- Dwarf — Mountain-folk, master ironworkers and stalwart defenders. (+15% iron production, attack 0%, defense +15%)
- You start with a small patch of land, a Castle and a Farm. Your storehouses and population start full, and an army of 30 Militia stands guard at the Castle, so you can build and expand straight away. The Castle is your seat of power: every level of it produces a little of every resource and unlocks more buildings.
- You are protected at first. A new-player shield (24h 0m 0s) keeps other players from attacking you. Attacking someone yourself ends it early.
- Grow. Build production buildings, train troops, and conquer the plots around you. Your Dashboard shows resources, buildings, troops and what is happening.
Land & terrain
Your island: islands are built as a pie of 8 slices, one player each. Your start region sits near the coast with forest, mountain, desert, farmland and grassland close by, and the slices meet at a neutral highland in the middle of the island.
The world is made of islands, and each island is a grid of plots. Many players share an island. A plot is either unclaimed, yours, or held by someone else. On the island map, unclaimed land is dimmed, your plots have a green ring, allies blue and other players orange, and dashed white outlines mark free plots next to your land that you can expand into.
On your own island you can only conquer or attack a plot that is right next to land you hold (up, down, left or right). To reach another island you need a ship (see Sailing). Ocean cannot be conquered. Harder terrain takes longer to march on and needs more strength to take:
| Terrain | Difficulty | Conquest march |
|---|---|---|
| Grassland | 2 | 3m 0s |
| Plains | 2 | 3m 0s |
| Beach | 3 | 4m 30s |
| Coastal | 4 | 6m 0s |
| Forest | 5 | 7m 30s |
| Desert | 6 | 9m 0s |
| Mountain | 8 | 12m 0s |
Who you can see. Other rulers on your island stay hidden until you discover them: their land comes within 4 tiles of yours, you attack each other, or you bump into their land while trying to conquer it. Allies and your spouse are always visible. Until then their land simply looks unclaimed. Discovery is permanent. Tap Island overview on the island map to see the whole island in one picture, and tap the picture to jump to that spot.
Before you attack a player, the attack panel shows your chance of victory for each army, worked out from the defenders as they stand now, and asks you to confirm before the troops leave.
Terrain also decides what you may build: a Sawmill needs forest, a Mine needs mountain, and so on. Exploring different terrain is how you unlock more resources.
Sailing
Ships carry armies across the sea to other islands. Build a Shipyard on a coastal plot (land that touches the ocean), train ships there, and leave them docked at that plot. Each ship carries 25 troops; ships are transport only and add nothing to a battle.
- First, discover somewhere to go. You can only sail an army to an island you have discovered, and at the start you know only your own. Open the World Map, click a dashed ? spot beside a known island and send a single ship from one of your ports to explore it (details under Exploring below).
- Setting sail: open a coastal plot on another island from the island map. If you have an army standing at one of your ports with enough ships docked, a Sail here panel lets you pick the voyage. The whole army goes, and the ships needed are taken from the port.
- Crossing time is 20m 0s plus 15m 0s for every step across the world map, so near islands are quicker.
- A free beach: the army lands and fights for the plot like any conquest. If it wins, the ships anchor there and you now hold a beachhead you can expand from over land.
- An enemy coast: the landing is an attack on that plot, with 10% less attack for fighting up a beach. The usual protections (shields, allies) still apply.
- If the landing fails the survivors and the ships sail home again, taking as long as the trip out.
- Your own coast: armies and ships can also dock at coastal plots you already hold on another island. Ships can sail on their own that way to be repositioned.
- Exploring: at the start you only know the islands where you hold land. On the World Map, dashed ? spots beside a known island can be explored: pick one and send a single ship from a port. It takes 4 times as long as an ordinary voyage that far. If nothing has been charted there a new island is found; either way the island becomes known to you and your alliance, the ship comes home, and armies can sail there.
- Ships eat food like other troops, on land or at sea.
Airships
Airships carry armies through the air anywhere on the same island. Build a Skydock (it needs a level 5 Castle) on any land, train airships there, and keep an army standing with them. Each airship carries 20 troops with a level 1 Skydock, and 10 more for every level above that (60 at level 5). Like ships, they are transport only and never fight.
- Flying: open your own plot, or a plot held by a member of your alliance, on the island map. The Fly here panel lets you pick an army standing with airships; the airships it needs go with it.
- Over anything: airships fly in a straight line over unclaimed land, other rulers' land, walls, moats and water. A flight takes 2m 0s to board and take off, plus 2s per tile.
- Where they land: only on your own land or your alliance's. On your own land the airships stay where they landed, ready to fly again. After setting an army down on an ally's land they fly straight back to where they took off.
- Dungeons and raids: airships can also fly an army straight into the assault on a dungeon or raid site on the island, without standing next to it first. Once the fight is over, win or lose, they carry the survivors back to where they took off.
- Moving airships: airships can fly on their own to any of your plots, to reposition them.
- Airships eat food like other troops.
Spies
You can only see the troops and buildings on your own land and your allies' land. Everyone else's armies and buildings are hidden, except that an army standing near your land shows as a marker on the map (you see that it is there, not how big it is). How far away you can spot it depends on the ground it stands on: 3 tiles over plains, desert and coast, 2 over grassland, and only 1 in forest and mountains. A Spymaster shows you the sizes too, and every troop location and building of the player they are watching. Appoint a grown heir as a Spymaster on the Dynasty page, then manage them on the Spymasters page.
- Spying: send your Spymaster to a player you have discovered (not an ally). After a short infiltration (4h 30m 0s for a typical spymaster, quicker with more Intrigue) you can see where their troops are on the island map, and reports arrive as events.
- Intel: each report tells you one thing: what they hold and earn, troops being trained or marching (a warning if an army is coming for you), relics, heirs born or lost, who else they have discovered, snippets from alliance chat, whether their troops are starving, and more. The important secrets come from skilled spies. Higher Intrigue also means reports more often, but never more than twice a day.
- Guarding: a Spymaster who is not sent anywhere protects your realm. Every few hours they get a chance to uncover an enemy spy watching you, better if their Intrigue beats the spy's. Send some Spymasters to watch rivals and keep others at home to guard your kingdom; each one at home gets its own chance to catch a spy.
- Caught spies: a discovered spy is either captured or killed in the attempt. A captured spy is held by the player who caught them, who can ask a gold ransom or let them go; unclaimed captives are executed after 72 hours. If a spy is captured, their captor learns who sent them; if one is killed, nobody learns who sent it.
Jousting Tournaments
Every other day the realm holds a jousting tournament for knights of veteran rank 3 or higher. Find it under Tournaments in the menu (also linked from your Dynasty page).
Betting: anyone can bet gold or gems on the tournament. Once a round is drawn you can back the winner of each joust until it is ridden, and once the bracket is drawn you can back the overall winner until round 1. Odds are fixed when you bet and come from the knights' strength, so favourites pay less; a winning bet pays your stake times the odds and a losing bet is lost. Bets are limited per bet and per tournament, and refunded if the tournament is cancelled.
- Registration is open for the first 24 hours of each 48-hour cycle. Enter a knight who is at home, unwounded and not leading an army. Once entered, a knight cannot be recalled or used for anything else until the tournament is over.
- Seeding: when registration closes the entries are seeded into a knockout bracket by strength, so the strongest knights are placed furthest along. You can enter several knights, but a kingdom only fields as many as the size of the field justifies (one extra knight for every 3 kingdoms beyond 3), and the bracket holds 32 knights at most. Surplus knights, weakest first, are sent home. If fewer than 3 kingdoms enter, the tournament is cancelled.
- The joust starts at 12:00 UTC on the second day, with a round every 15 minutes up to the final. A knight's strength comes from their Martial skill and veteran rank, plus a dash of luck. Two of your own knights are never drawn against each other in the first round; if they ever do meet in a later round, the weaker stands aside and the stronger advances.
- Prizes: a kingdom is ranked by its best knight. The winner receives a random relic and a few gems; second and third place receive gold and a few gems.
- Danger: every bout carries a very small chance of a fatal accident that kills the knight.
Gems
Gems () are the game's special currency. Your balance is shown in the menu bar and in the Gem Shop.
- Earning: claim the daily gift in the shop (a streak of consecutive days pays a bonus), finish a round in the top 10, and complete one-time achievements such as your first building, conquest, victory, voyage, discovery, alliance and marriage.
- Speeding things up: a Finish now button appears beside build, training, march, voyage and expedition timers. The price is about 1 Gem for every 10 minutes still to wait. Attacks and conquests cannot be sped up.
- Shop items: shields, resource packs, a morale tonic and a healing salve for wounded knights.
Crests
Every alliance and every dynasty has a crest: a small coat of arms you design yourself. Pick a shape, a pattern, colours, an emblem and a border, and watch it change as you go.
- Your dynasty crest shows on your profile. Design it from the Dynasty page or Edit profile.
- The alliance crest shows on the alliance page, its members' profiles, the alliance list, the island map and the Kings Table. Only the alliance leader can change it (from the Alliance page).
- Premium parts () — rare shapes, metallic and jewel colours, special emblems and borders — are unlocked once for Gems and are then yours for every crest you make. An alliance crest uses the parts its leader has unlocked, and keeps working if the leader later leaves.
Changelog
Every update has a version number (shown at the bottom of every page). The first time you open the game after an update, a pop-up lists what was added or changed; press Got it to close it. The full history of every version is on the Changelog page, linked at the bottom of your dashboard and of every page.
Events
The Events page is a running record of what happens to you, even while you are away: battles you fight or defend (with the numbers), buildings and troops that finish, armies and fleets that arrive, dragon raids, expeditions, new heirs, alliance invitations, achievements and more. A count on the menu shows how many are new. Events are kept for 30 days. On a computer, the Events tab on the edge of the page slides out a live list of the latest ones; pick the left or right edge in your profile settings.
Market
The Market lets players trade resources for gold.
- Selling: choose wood, iron or food, an amount (at least 100) and a total price in gold. The goods leave your stock and wait safely on the market for 48 hours. You can cancel any time to get them back, and unsold goods return to you automatically. You can have up to 10 listings open.
- Buying: listings show the price per unit, compared with the recent average. Take a whole listing in one click.
- Fee: the seller pays a 5% market fee out of the price.
- Allies only: tick this to offer goods only to members of your alliance (a good way to help friends). Linked accounts (same network or device) cannot trade with each other.
- Everything you buy or sell is recorded in your Events.
Resources & storage
There are four resources: gold, wood, iron and food. They build up in real time, even while you are logged out. Population also grows (up to the housing you have) and pays gold in taxes.
- Levels: every building goes up to level 5, and each level is a big step. A building's strength at levels 1 to 5 is 1 / 5 / 10 / 15 / 20: everything a building gives (production, room for people, defense, storage) is its level-1 amount times its strength.
- The Castle gives 5 of every resource per hour for each point of its strength, so you can never be completely stuck.
- Production buildings (Farm, Sawmill, Mine, Gold Mine) make much more of one resource per level, and your race may boost one of them.
- Storage limit: you can hold up to 1,000 of each resource, plus 250 per point of Castle strength and 750 per point of Warehouse strength. When a resource is full it is marked full and extra production is wasted, so spend it or build a Warehouse.
- Big upgrades cost more than a low storage limit can hold. If a cost is marked with a dashed outline, raise your storage first.
Buildings
Build on the plots you own from the island map (tap a plot of yours). Construction takes time, and every upgrade costs more and takes longer than the last. Some buildings can only be built once per player (marked below), and many need a higher Castle first. You can build several Barracks to train troops at more than one plot.
| Building | What it does | Where | Requires |
|---|---|---|---|
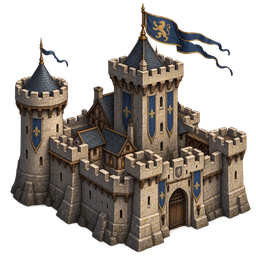 Castle Castle |
The seat of your rule. Unlocks other structures as it grows. (one per player) | Any land | — |
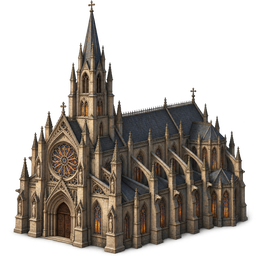 Cathedral Cathedral |
Lifts the spirits of your troops: raises where morale settles and how fast it recovers. (one per player) | Any land | Castle level 2 |
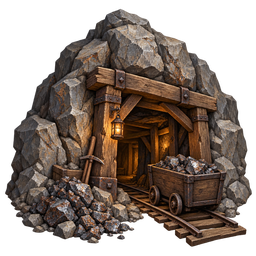 Mine Mine |
Digs iron ore from the mountainside. | Mountain | — |
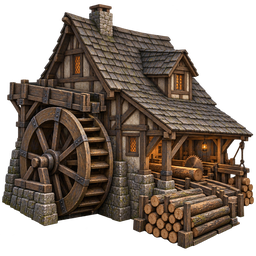 Sawmill Sawmill |
Fells and mills timber from the island forest. | Forest | — |
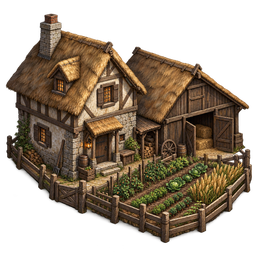 Farm Farm |
Grows food to feed your people and your troops. | Grassland, Plains | — |
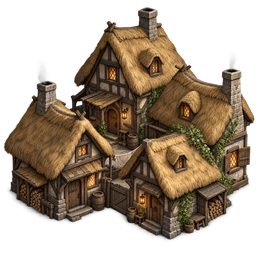 Housing Housing |
Modest homes that grow your population capacity. | Grassland | — |
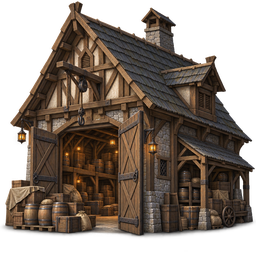 Warehouse Warehouse |
Raises your storage limit and keeps part of every stockpile safe from dragon raids. (one per player) | Any land | Castle level 1 |
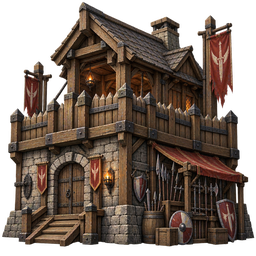 Barracks Barracks |
Trains foot soldiers: Swordsmen, Spearmen and Champions. The backbone of any army. | Any land | Castle level 1 |
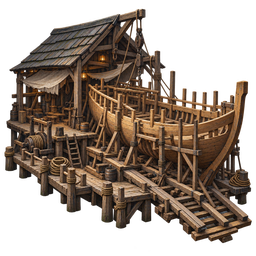 Shipyard Shipyard |
Builds ships that carry armies to other islands (coastal plots only). | Coastal | Castle level 2 |
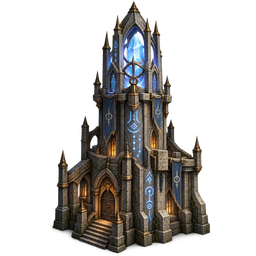 Wizard Tower Wizard Tower |
A tower of wizardry that wards your realm: it softens the damage of dragon raids and adds strong defense to its plot. (one per player) | Any land | Castle level 2 |
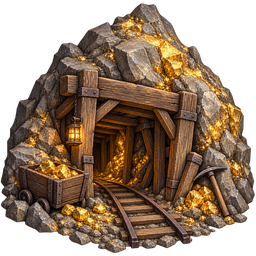 Gold Mine Gold Mine |
A rare, rich vein of gold beneath the desert sands. | Desert | — |
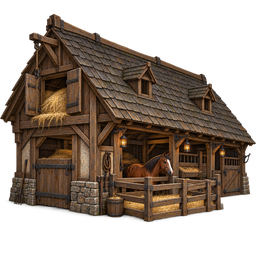 Stables Stables |
Trains mounted units: Cavalry, Scouts and Lancers. Fast riders that ride down foot soldiers. | Any land | Castle level 2 |
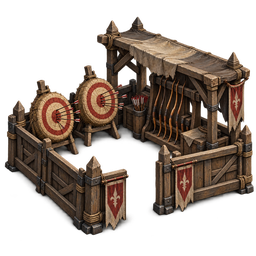 Archery Range Archery Range |
Trains ranged units: Bowmen, Crossbowmen and Long Bowmen. Deadly at a distance, fragile up close. | Any land | Castle level 2 |
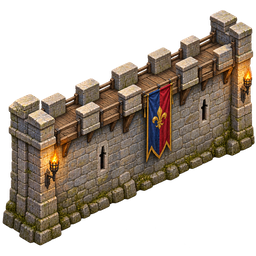 Wall Wall |
An impassable barrier on your land. Blocks every army, including your own - build a Gate to let your own troops through. Can be destroyed by a siege. | Any land | — |
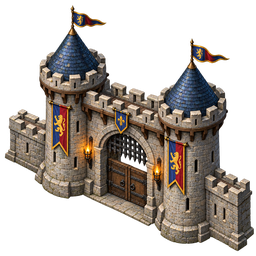 Gate Gate |
A crossing point in your wall line. Your own troops pass freely; everyone else must breach it like a wall. | Any land | Wall level 1 |
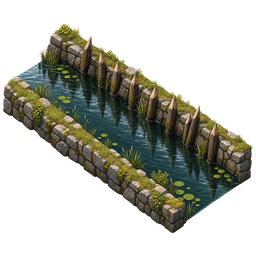 Moat Moat |
A ditch hugging your wall. Does not block, but drags any march that crosses it. | Any land | — |
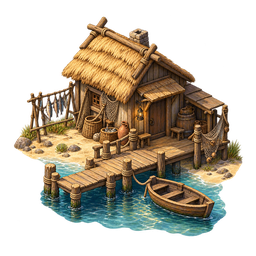 Fishing Hut Fishing Hut |
Nets fish from the lake shore to feed your people and your troops. | Beach | — |
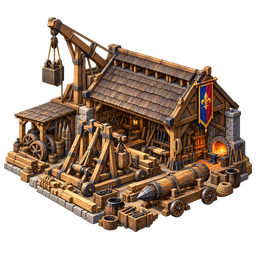 Siege Workshop Siege Workshop |
Builds siege engines: Battering Rams, Ballistae and Trebuchets. Slow and fragile in the field, devastating against walls. | Any land | Castle level 3 |
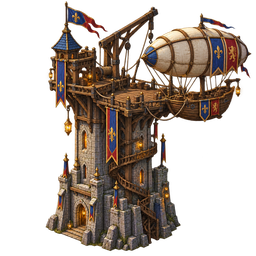 Skydock Skydock |
Builds Airships, which carry an army over anything on the island - walls, enemy land and sea - and set it down on your own or your alliance's land. Each level lets every airship carry more troops. | Any land | Castle level 5 |
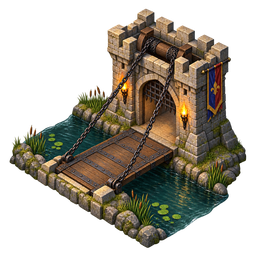 Drawbridge Drawbridge |
A crossing in your moat. It drags enemy marches just like the moat, but is lowered for you and your alliance, who cross at full speed. | Any land | Moat level 1 |
Every building also adds a little defense to its plot, and building levels count toward your score. Your Castle strengthens all your plots within 10 tiles (+1% defense per point of Castle strength, up to +20%).
Troops & armies
Soldiers are trained at the buildings shown below; they cost resources and population and take time. Trained troops wait in the reserve of the plot that trained them, where they help defend it.
| Unit | Attack | Defense | Food per hour | Trained at | Role |
|---|---|---|---|---|---|
| Militia | 2 | 2 | 0.5 | Castle level 1 | Cheap levies, trained at the Castle. Better soldiers come from the Barracks. |
| Ship | 10 | 8 | 2 | Shipyard level 1 | Carries armies across the sea. |
| Swordsman | 4 | 4 | 0.8 | Barracks level 1 | A trained blade: twice the fighter a Militia is. |
| Spearman | 3 | 5 | 0.8 | Barracks level 3 | A wall of points: twice as strong against mounted units, attacking or defending. |
| Champion | 9 | 9 | 1.5 | Barracks level 5 | A veteran heavy infantryman. Very strong, very expensive. |
| Cavalry | 6 | 4 | 1.3 | Stables level 1 | Fast riders: 50% stronger against foot soldiers and archers. |
| Scout | 1 | 1 | 0.5 | Stables level 3 | Rides out to keep watch and reveals what stands nearby. Fights poorly. |
| Lancer | 11 | 6 | 2 | Stables level 5 | Heavy cavalry: 75% stronger against foot soldiers and archers. |
| Bowman | 4 | 1 | 0.8 | Archery Range level 1 | Fires at adjacent tiles without moving. Needs other soldiers to protect them. |
| Crossbowman | 9 | 1 | 1.3 | Archery Range level 3 | Hits very hard in battle but cannot shell other tiles and has almost no defense. |
| Long Bowman | 7 | 2 | 1 | Archery Range level 5 | A stronger Bowman that fires up to two tiles. Needs protection too. |
| Battering Ram | 4 | 1 | 1 | Siege Workshop level 1 | A roofed log on wheels: five times as strong against walls and gates. Storms the wall with the rest of the army. |
| Ballista | 6 | 2 | 1.3 | Siege Workshop level 3 | A giant crossbow: a fair fighter in battle and three and a half times as strong against walls. |
| Trebuchet | 6 | 1 | 2 | Siege Workshop level 5 | Hurls stones at a wall next to it without marching, and takes no losses doing it: six times as strong against walls. |
| Airship | 0 | 2 | 2 | Skydock level 1 | Carries an army through the air to your own or your alliance's land anywhere on the island. Transport only: it never fights. |
Unit roles in battle
- Counters. Cavalry hit foot soldiers and archers harder (Lancers even more), and Spearmen are twice as strong against mounted units, whether attacking or defending. How much a counter matters depends on how much of the enemy force it is aimed at: a few Cavalry in a spearmen army change little, while a cavalry charge into a wall of Spearmen is a disaster. The battle report lists the counter bonuses that applied.
- Ranged units (Bowmen, Crossbowmen, Long Bowmen) get opening fire: a bonus to their attack and defense in battle (10%). But they are fragile: they need protection from front-line troops (foot, spear and mounted units; Scouts do not count). Roughly one front-line soldier for every 2 ranged units keeps them fully covered. Unprotected archers add much less defense and die faster.
- Volley. An army with Bowmen or Long Bowmen can shell an enemy tile without moving: Bowmen reach 1 tile, Long Bowmen up to 2 (Crossbowmen cannot shell, they only add their punch to a full battle). Use the Volley panel on the army's card, or on an enemy plot's details when your archers are in reach. The defenders lose a share of their troops (at most 25%), nothing is captured and your archers take no losses, but each army can only fire once every 30m 0s. Archers without front-line troops beside them barely hurt anyone. Shelling counts as an attack: it ends your new-player shield and the defender learns who you are.
- Scouts (trained at the Stables, level 3) keep watch. Open an unclaimed plot on the island map and post scouts there (up to 200 tiles from the plot they ride out from; you can have 5 posts). While they are there you see the buildings and exact troop counts of other rulers' land around them, and any ruler they spot is discovered. How far they see depends on the ground being watched: 3 tiles over plains, desert and coast, 2 over grassland, and only 1 in forest and mountains. Enemies cannot see your scouts, but if another ruler claims the tile they are captured. Scouts eat food like other troops. Recall them from the tile or from the Armies page: they ride back to your castle.
- Mix your army: soldiers to shield the archers, spearmen against horsemen, cavalry against footmen and archers. Look at what your enemy fields before you attack.
To use soldiers you form them into armies on the Armies page:
- Form an army from the reserve at a plot, give it a name, and optionally put a leader (knight) in command.
- Add troops from the reserve at the army's plot, combine two armies standing on the same plot, split one into two, or disband it (the troops go back to the reserve).
- Send an army from its card, or tap any plot on the island map and choose an army to send there. Your own plots: it simply marches. Free plots: it conquers. Another player's plots: it attacks.
- An army does not need to start next to its target. It first marches to your plot beside the target, then carries on by itself. Troops on the road cannot be changed until they arrive.
- You can also march reserve troops to another of your plots, for example to reinforce an army out in the field, then add them to it there.
- Veterancy: an army earns a rank-up every time it wins a battle it launches (taking free land or a player's tile) and cumulative wins cross a threshold. Each rank-up lets you choose a small permanent perk for that army: attack, march speed, or resilience (fewer of its own losses). Knights level up the same way from battles they lead to victory, choosing between attack, march speed, raid defense or a bigger lead cap. Combining armies keeps the higher veterancy of the two; splitting one off always starts the new detachment fresh, so only the original formation keeps its earned rank. Veterancy resets with the round.
Conquering & battles
Free land
An army sent at an unclaimed plot marches for 1m 30s per point of terrain difficulty and then fights the land itself. The stronger your army compared with the terrain, the more of it survives. If some survive, the plot is yours and the army stands on it.
Attacking players
An attack marches for 1m 0s per point of difficulty, then a battle is fought against the plot's defense value: the troops standing there, the terrain, the buildings, your Castle's aura, the race bonus, a leader's skill and morale, with a little luck either way. The stronger side wins.
- If the attacker wins, the plot changes hands: the building loses about half its levels (or is destroyed) and the defender's troops there are gone. If it fails, most of the attacking force is lost.
- Players under a shield cannot be attacked. Losing your very last plot costs you half your resources and some heirs, but you are resettled on fresh land with a short 12h 0m 0s shield.
- You are warned on the Dashboard and the island map when an attack is heading for one of your plots. Keep troops in your reserve or armies on important plots, and build up your Castle.
Food & morale
Food upkeep
Every soldier eats food each hour (see the table above) — reserve troops, armies and troops on the march alike. The food line in your resource bar shows what is left after your troops eat. Keep food production above their upkeep by building and upgrading Farms.
If the food runs out, your troops starve. First their morale collapses. If it lasts more than 72 hours, soldiers start to desert (about 2% each hour) until they are fed again.
Morale
Morale is shown next to your resources, from 0 to 100 (50 is normal). It changes your troops' attack and defense by up to 15% and their march speed by up to 10%. Below 25 nobody will train as a recruit.
- It rises with victories (winning an attack, holding a plot, conquering land).
- It falls with defeats, lost plots, failed conquests, dragon raids, a leader dying — and hunger.
- It always drifts toward a resting level: 50 normally, higher with a Cathedral (+1.5 per point of Cathedral strength), and very low while starving.
Dragons
Now and then a dragon wave sweeps over the world and raids a few plots at random, taking a share of that player's resources, sometimes damaging a building or killing troops there, and shaking morale. The Wizard Tower, your race's defense and a leader stationed on the plot soften the blow. A Warehouse keeps part of every stockpile completely safe (150 of each resource per point of Warehouse strength). Players under a new-player shield are never raided. Raids you have not seen yet are listed on your Dashboard.
Skirmishes
Small camps - goblin camps, bandit villages and the like - occasionally spring up on unclaimed land near your territory. Conquering that plot fights the camp too and pays extra loot on top of the usual conquest reward. Leave one alone too long, though, and it grows bold enough to raid your lands in a small way on its own, costing you a little resources and troops. Camps near you show up on your Dashboard and on the map. This is the first of three encounter types - tougher, group-scale Dungeons and alliance-scale Raids build on the same system below.
Dungeons
A handful of tougher lairs - a Troll Warren, an Orc Stronghold and the like - sit fixed on each island, spread out so there's usually one worth expanding toward. Unlike a Skirmish, a dungeon has a shared pool of HP that no single army can burst through alone: send a force to assault it and you chip away at that HP (and take some losses either way), but the fight never claims the land and your troops always march home afterward, win or lose. Team up - anyone who lands a hit gets a share of the loot once the dungeon's HP finally hits zero, split by how much damage each of you dealt. Cleared dungeons return after a cooldown, so there's always something to work toward.
Raids
The biggest fights in the game. Now and then a raid site appears out in the open water off the coast of an island with players living on it - never on empty, unsettled land. It's reachable only by ship or airship, and its HP pool dwarfs a dungeon's: clearing one takes many fleets, likely your whole alliance and any allies who join in, working together over real days. Sail an army out from a coastal Shipyard port (from your own island's coast or another's) and it joins the assault the same way a dungeon does - chipping away at HP, always returning home afterward, never claiming the site itself. Everyone who lands a hit shares the spoils when it finally falls: gold, Gems, and a chance at a rare relic for one lucky contributor. Every alliance holding land on the host island (and anyone unaffiliated living there) is notified the moment a raid appears, so nobody misses the call to arms.
Dynasty & leaders
Your ruler founds a dynasty. On the Dynasty page you can marry another player (or adopt/buy from the Heir Market). A married couple has an heir about every 4h 0m 0s (up to 10 living heirs each). Marching is 10% faster for a player married to another player.
- A new heir grows up for about 2h 0m 0s. When they are fully grown you choose when to press Come of age. You can rename any heir.
- Banish: not happy with an heir's stats? You can Banish any child or adult heir who has no post (not a knight or noble, not on the Heir Market, not leading an army). They leave the dynasty for good and free a place, so a new heir can be born at the next birth. Use it to try again for a better one.
- An adult heir can become a knight (a leader): put him in command of an army from the Armies page. A knight adds attack, speed and defense bonuses to the troops he can command (more martial skill means more troops and stronger bonuses). Knights can be wounded or killed in battle.
- Or appoint the heir as a noble: a Governor boosts a producing building, a Steward speeds up training, an Envoy raises your alliance's size and gives every member's troops a small attack and march-speed bonus (scaling with the Envoy's Diplomacy, summed across all your alliance's Envoys), and a Spymaster spies on rivals or guards your realm (see Spies).
- Bloodlines: every heir has the blood of their parents' races. Orcs lean martial and sly, Elves lean diplomatic and sly, Dwarves lean stewardly and martial, Humans are balanced (each race is weaker at something too). If the parents are of different races the child is mixed (a Half-Orc, an Orc-Elf, and so on): a blend of both, with a little extra vigour. Hover an heir's badge to see their strengths. A knight or noble also gets a small perk from their blood: Orc knights charge harder, Elf knights march faster, Dwarf knights defend better and Dwarf Stewards train faster, and Human Governors get more from their tile. Heirs are named in the style of their race.
Alliances
Join or found an Alliance (up to 30 members). Allies cannot attack each other, see each other's land in blue on the map, and share a private alliance chat. Leaders and officers invite players; invitations arrive as mail and as a notice at the top of the page.
- Alliance profiles: click any alliance name to see its crest, motto, description and members. Open alliances have a Join button on the profile; for an invite-only alliance you can Apply to join with a short message (up to 3 open applications at a time, and you can withdraw one any time). The leader and officers see applications on the Alliance page and are told by an event; you get an event and a mail with the answer.
- Motto: the alliance leader sets the motto and description from the Alliance page.
Achievements, Merits & Rank
- Achievements track your progress at all kinds of play - attacking, expanding, building, diplomacy, trading, sailing, dragon raids, marriage, Kings Table finishes, referrals and suggestions - each in a few tiers (an achievement only shows up on your Achievements page once you've made some progress toward it). Earning a tier is permanent, pays Gems, and unlocks a design: a painted nameplate shown behind your name everywhere it appears (with the emblem of the achievement that earned it) and a matching chat bubble for your messages. Choose them, mixing and matching freely, in Edit profile; more designs are in the Gem Shop. Choose up to 3 achievements to showcase on your profile too.
- Merits are badges the team awards by hand - contests, special recognition, and a Founder merit for early playtesters.
- Rank is a title reflecting how you have actually been playing lately (Bloodthirsty, Pioneer, Architect and more), based on your recent actions - it fades over time if you change how you play, and resets with the round.
Relics
Rare physical treasures, seeded very sparingly onto islands when they're discovered. Kingdom relics sit in a Castle or Cathedral and boost your whole realm (production, defense or storage); troop relics are equipped to a knight leading an army, like armor or a weapon, boosting that knight's attack, speed, raid defense or how many troops they can lead. Manage yours from the Relics page.
Relics change hands through conquest: capture an enemy's Castle or Cathedral plot and you capture whatever relic sits inside it; if a knight carrying a relic falls in battle against another player, the relic is yours; if a knight falls conquering unclaimed land, the relic they carried is left lying on that plot for whoever conquers it next. Nearly all relics are lost when the round resets - only the rare, named relics the team occasionally awards as prizes last between rounds.
Rounds & score
Between rounds: your account, profile, crest, Gems, achievements, round trophies and unlocked crest parts always stay with you, and so does a shield you bought with Gems. When a new round begins you can continue as one of your heirs (you keep your name, but your ruler takes the heir's race, gender and skills, and a child of two races makes you a mixed-race ruler) or start fresh as one of the four races.
The game runs in rounds of about 30 days. Your score is your building levels, plus 2 for every plot you hold, plus 5 for every battle you win. At the end of a round the top 10 players are recorded in the Hall of Fame and earn extra starting resources next round; then the world resets and everyone chooses a race again. Your trophies stay on your profile.
Beginner tips
- Upgrade your Castle early — it unlocks buildings, raises storage and produces every resource.
- Food matters: build a Farm (grassland or plains) before you train a big army.
- Conquer the plots around you to find other terrain (forest for wood, mountain for iron, desert for gold), then build the matching production building.
- Train troops at your Castle or Barracks, form an army, and expand steadily. Keep some defense at home.
- Build a Warehouse when your resources hit the storage limit, and a Cathedral for better morale.
- Join an alliance, say hello in chat, and check your mail.
Chat, mail & profiles